(http://www.digimoon.net/)
※ 참고문서
http://askubuntu.com/questions/493460/how-to-install-add-apt-repository-using-the-terminal
https://launchpad.net/~gluster/+archive/ubuntu/glusterfs-3.5
http://staged-gluster-docs.readthedocs.io/en/release3.7.0beta1/Administrator%20Guide/Geo%20Replication/
Getting started setup aws
http://www.gluster.org/community/documentation/index.php/Getting_started_setup_aws
GlusterFS and its nature of configuration high availability
http://blog.gluster.org/category/failover/
목차
1. 준비사항
2. glusterfs server 패키지 설치
3. glusterfs server 기본 구성
4. glusterfs client 패키지 설치
5. glusterfs client 기본 구성
6. geo-replication 관리
1. 준비사항
OS : Ubuntu 12.04 Server amd64
모든 스토리지 노드에 동일한 내용의 /etc/hosts 설정
root@server01:~# cat /etc/hosts
127.0.0.1 localhost.localdomain localhost
192.168.159.10 server01.glustefs.priv server01
192.168.159.20 server02.glustefs.priv server02
192.168.159.30 server03.glustefs.priv server03
192.168.159.40 server04.glustefs.priv server04
# The following lines are desirable for IPv6 capable hosts
::1 ip6-localhost ip6-loopback
fe00::0 ip6-localnet
ff00::0 ip6-mcastprefix
ff02::1 ip6-allnodes
ff02::2 ip6-allrouters
2. glusterfs server 패키지 설치
본 문서에서는 운영체제로 Ubuntu 12.04가 설치된 시스템에 glusterFS를 설치하는 내용을 다룬다.
타 운영체제에 설치하는 방법은 아래 링크를 참고한다. glusterfs는 패키지 설치 방법 외에는 기술적으로 운영체제별 차이점이 거의 없다.
http://www.gluster.org/community/documentation/index.php/Getting_started_install
2.1. 스토리지 서버에 xfsprogs 패키지 설치
XFS 파일시스템을 커널에 적용하기 위해 xfsprogs 패키지를 모든 스토리지 서버에 설치
root@server01:~# apt-get install xfsprogs
Reading package lists... Done
Building dependency tree
Reading state information... Done
The following extra packages will be installed:
libreadline5
Suggested packages:
xfsdump acl attr quota
The following NEW packages will be installed:
libreadline5 xfsprogs
0 upgraded, 2 newly installed, 0 to remove and 3 not upgraded.
Need to get 1,354 kB of archives.
After this operation, 3,082 kB of additional disk space will be used.
Do you want to continue [Y/n]? y
Get:1 http://us.archive.ubuntu.com/ubuntu/ precise/main libreadline5 amd64 5.2-11 [128 kB]
Get:2 http://us.archive.ubuntu.com/ubuntu/ precise/main xfsprogs amd64 3.1.7 [1,226 kB]
Fetched 1,354 kB in 5s (266 kB/s)
Selecting previously unselected package libreadline5.
(Reading database ... 52499 files and directories currently installed.)
Unpacking libreadline5 (from .../libreadline5_5.2-11_amd64.deb) ...
Selecting previously unselected package xfsprogs.
Unpacking xfsprogs (from .../xfsprogs_3.1.7_amd64.deb) ...
Processing triggers for man-db ...
Setting up libreadline5 (5.2-11) ...
Setting up xfsprogs (3.1.7) ...
Processing triggers for libc-bin ...
ldconfig deferred processing now taking place
root@server01:~#
2.2. 스토리지 서버에 glusterfs 패키지 설치
2015년 3월 현재 Ubuntu 12.04의 기본 repository에서 제공하는 glusterfs의 버전은 3.2.5이며 이는 최신 버전이 아니다.
root@server01:~# glusterd --version
glusterfs 3.2.5 built on Jan 31 2012 07:39:58
Repository revision: git://git.gluster.com/glusterfs.git
Copyright (c) 2006-2011 Gluster Inc. <http://www.gluster.com>
GlusterFS comes with ABSOLUTELY NO WARRANTY.
You may redistribute copies of GlusterFS under the terms of the GNU General Public License.
root@server01:~#
※ Ubuntu 12.04 LTS, 12.10, 13.10, 14.04 LTS는 glusterfs 패키지를 기본 제공한다.glusterfs 3.2.5 built on Jan 31 2012 07:39:58
Repository revision: git://git.gluster.com/glusterfs.git
Copyright (c) 2006-2011 Gluster Inc. <http://www.gluster.com>
GlusterFS comes with ABSOLUTELY NO WARRANTY.
You may redistribute copies of GlusterFS under the terms of the GNU General Public License.
root@server01:~#
Ubuntu 12.04의 기본 repository에서 제공하는 낮은 버전의 glusterfs가 스토리지 서버에 이미 설치되어 있다면 우선 삭제한다.
root@server01:~# apt-get remove glusterfs-*
Ubuntu 기본 repository에는 최신 버전의 glusterfs가 없으므로 community GlusterFS PPA(Personal Package Archive)로부터 원하는 버전의 glusterfs 패키지를 받아 설치할 것이다.
PPA를 Ubuntu에서 사용하기 위해서는 python-software-properties 패키지가 설치되어 있어야 한다.
root@server01:~# apt-get install python-software-properties
Reading package lists... Done
Building dependency tree
Reading state information... Done
The following extra packages will be installed:
python-pycurl unattended-upgrades
Suggested packages:
libcurl4-gnutls-dev python-pycurl-dbg bsd-mailx
The following NEW packages will be installed:
python-pycurl python-software-properties unattended-upgrades
0 upgraded, 3 newly installed, 0 to remove and 104 not upgraded.
Need to get 97.3 kB of archives.
After this operation, 657 kB of additional disk space will be used.
Do you want to continue [Y/n]? y
Get:1 http://us.archive.ubuntu.com/ubuntu/ precise-updates/main unattended-upgrades all 0.76ubuntu1 [24.7 kB]
Get:2 http://us.archive.ubuntu.com/ubuntu/ precise/main python-pycurl amd64 7.19.0-4ubuntu3 [49.2 kB]
Get:3 http://us.archive.ubuntu.com/ubuntu/ precise-updates/main python-software-properties all 0.82.7.7 [23.5 kB]
Fetched 97.3 kB in 1s (67.3 kB/s)
Preconfiguring packages ...
Selecting previously unselected package unattended-upgrades.
(Reading database ... 52756 files and directories currently installed.)
Unpacking unattended-upgrades (from .../unattended-upgrades_0.76ubuntu1_all.deb) ...
Selecting previously unselected package python-pycurl.
Unpacking python-pycurl (from .../python-pycurl_7.19.0-4ubuntu3_amd64.deb) ...
Selecting previously unselected package python-software-properties.
Unpacking python-software-properties (from .../python-software-properties_0.82.7.7_all.deb) ...
Processing triggers for man-db ...
Processing triggers for ureadahead ...
Setting up unattended-upgrades (0.76ubuntu1) ...
Setting up python-pycurl (7.19.0-4ubuntu3) ...
Setting up python-software-properties (0.82.7.7) ...
root@server01:~#
http://www.gluster.org 에서 원하는 PPA를 찾아 각 스토리지 서버에 적용
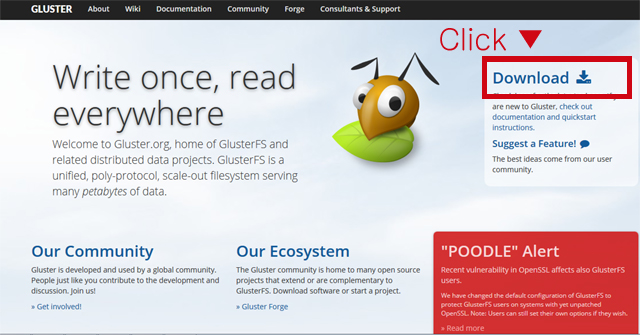
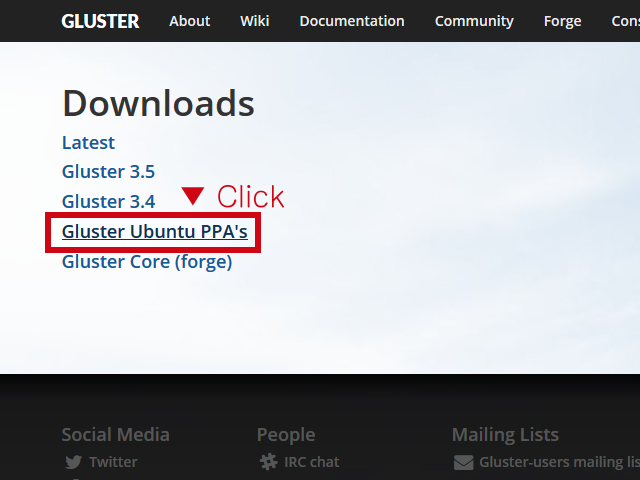
원하는 버전의 glusterfs를 선택한다. glusterfs-3.6 을 선택하였다.
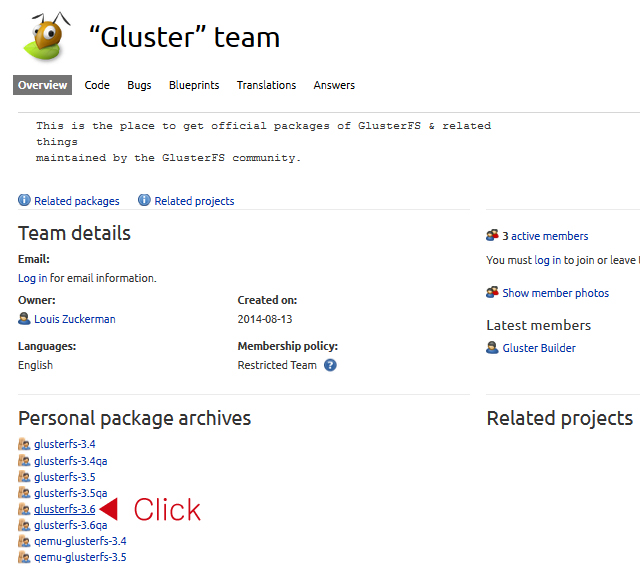
붉게 테두리친 부분(ppa:gluster/glusterfs-3.6)이 PPA 이름이다.
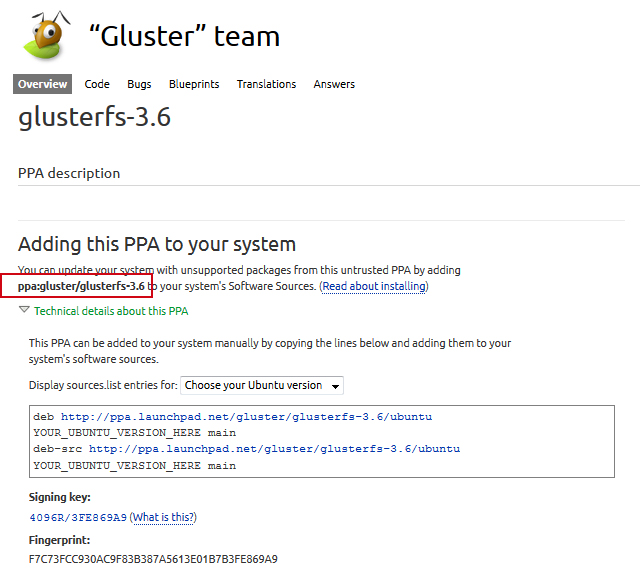
모든 스토리지 서버에 PPA 설치
root@server01:~# add-apt-repository ppa:gluster/glusterfs-3.6 -y
gpg: keyring `/tmp/tmpuI_TXr/secring.gpg' created
gpg: keyring `/tmp/tmpuI_TXr/pubring.gpg' created
gpg: requesting key 3FE869A9 from hkp server keyserver.ubuntu.com
gpg: /tmp/tmpuI_TXr/trustdb.gpg: trustdb created
gpg: key 3FE869A9: public key "Launchpad PPA for Gluster" imported
gpg: Total number processed: 1
gpg: imported: 1 (RSA: 1)
OK
root@server01:~# apt-get update
모든 스토리지 서버에 glusterfs 패키지를 설치한다. PPA로부터 glusterfs 3.6.1을 받아 설치하게 된다.
root@server01:~# apt-get install glusterfs-*
glusterfs 버전 확인
root@server01:~# glusterd --version
glusterfs 3.6.1 built on Dec 20 2014 03:12:21
Repository revision: git://git.gluster.com/glusterfs.git
Copyright (c) 2006-2013 Red Hat, Inc. <http://www.redhat.com/>
GlusterFS comes with ABSOLUTELY NO WARRANTY.
It is licensed to you under your choice of the GNU Lesser
General Public License, version 3 or any later version (LGPLv3
or later), or the GNU General Public License, version 2 (GPLv2),
in all cases as published by the Free Software Foundation.
root@server01:~#
3. glusterfs server 기본 구성
glusterfs 패키지를 설치하였으면 이제 구성을 시작한다. brick을 먼저 만들 것이다.
brick은 신뢰된 storage pool에 있는 서버의 export 디렉토리로 표현되는, glusterFS의 기본 스토리지 유닛이다. brick은 아래의 포맷과 같이 export 디렉토리와 서버의 결합체로 표현된다.
SERVER : EXPORT
예:
myhostname: /exports/myexportdir/
glusterfs-server의 brick으로 사용할 block device(여기서는 /dev/sdb)를 모든 스토리지 서버에 추가하고 논리 볼륨으로 만들기
root@server01:~# fdisk /dev/sdb
Device contains neither a valid DOS partition table, nor Sun, SGI or OSF disklabel
Building a new DOS disklabel with disk identifier 0xd1c2a3d3.
Changes will remain in memory only, until you decide to write them.
After that, of course, the previous content won't be recoverable.
Warning: invalid flag 0x0000 of partition table 4 will be corrected by w(rite)
Command (m for help): n
Partition type:
p primary (0 primary, 0 extended, 4 free)
e extended
Select (default p): p
Partition number (1-4, default 1):
Using default value 1
First sector (2048-20971519, default 2048):
Using default value 2048
Last sector, +sectors or +size{K,M,G} (2048-20971519, default 20971519):
Using default value 20971519
Command (m for help): w
The partition table has been altered!
Calling ioctl() to re-read partition table.
Syncing disks.
root@server01:~# partprobe
Warning: Unable to open /dev/sr0 read-write (Read-only file system). /dev/sr0 has been opened read-only.
Warning: Unable to open /dev/sr0 read-write (Read-only file system). /dev/sr0 has been opened read-only.
Warning: Unable to open /dev/sr0 read-write (Read-only file system). /dev/sr0 has been opened read-only.
Error: Error informing the kernel about modifications to partition /dev/sr0p1 -- Invalid argument. This means Linux won't know about any changes you made to /dev/sr0p1 until you reboot -- so you shouldn't mount it or use it in any way before rebooting.
Error: Failed to add partition 1 (Invalid argument)
root@server01:~# pvcreate /dev/sdb1
Physical volume "/dev/sdb1" successfully created
root@server01:~# vgcreate glusterfs /dev/sdb1
Volume group "glusterfs" successfully created
root@server01:~# lvcreate -l 100%VG -n brick01 glusterfs
Logical volume "brick01" created
root@server01:~#
brick용 논리볼륨을 XFS 파일시스템으로 포맷하고 임의로 만든 디렉토리(여기서는 /brick01)에 마운트한다. 영구 적용 위해 /etc/fstab에 XFS 파일시스템 마운트 설정을 추가한다.
root@server01:~# mkfs.xfs -i size=512 /dev/glusterfs/brick01
meta-data=/dev/glusterfs/brick01 isize=512 agcount=4, agsize=655104 blks
= sectsz=512 attr=2, projid32bit=0
data = bsize=4096 blocks=2620416, imaxpct=25
= sunit=0 swidth=0 blks
naming =version 2 bsize=4096 ascii-ci=0
log =internal log bsize=4096 blocks=2560, version=2
= sectsz=512 sunit=0 blks, lazy-count=1
realtime =none extsz=4096 blocks=0, rtextents=0
root@server01:~# mount /dev/glusterfs/brick01 /brick01
root@server01:~# df -h
Filesystem Size Used Avail Use% Mounted on
/dev/mapper/ubuntu--vg-root 18G 1.2G 16G 7% /
udev 984M 4.0K 984M 1% /dev
tmpfs 199M 244K 199M 1% /run
none 5.0M 0 5.0M 0% /run/lock
none 994M 0 994M 0% /run/shm
/dev/sda1 236M 32M 192M 14% /boot
/dev/mapper/glusterfs-brick01 10G 33M 10G 1% /brick01
root@server01:~# mkdir -p /brick01/data
root@server01:~# echo "/dev/glusterfs/brick01 /brick01 xfs defaults 0 0" >> /etc/fstab
root@server01:~#
root@server01:~# gluster peer probe server02.glustefs.priv
peer probe: success.
root@server01:~# gluster peer probe server03.glustefs.priv
peer probe: success.
root@server01:~# gluster peer probe server04.glustefs.priv
peer probe: success.
root@server01:~#
root@server01:~# gluster peer status
Number of Peers: 3
Hostname: server02.glustefs.priv
Uuid: a576d369-9be4-40cf-b801-769303bfe5d3
State: Peer in Cluster (Connected)
Hostname: server03.glustefs.priv
Uuid: bec7fd96-912b-4355-8704-0a64b2bba5ab
State: Peer in Cluster (Connected)
Hostname: server04.glustefs.priv
Uuid: 03137d1f-51df-4460-8f5e-97ca2dd2f103
State: Peer in Cluster (Connected)
root@server01:~#
root@server01:~# gluster volume create repl_dist_vol replica 2 transport tcp server01.glusterfs.priv:/brick01/data server02.glusterfs.priv:/brick01/data server03.glusterfs.priv:/brick01/data server04.glusterfs.priv:/brick01/data
Creation of volume repl_dist_vol has been successful. Please start the volume to access data.
root@server01:~#
root@server01:~# gluster volume info
Volume Name: repl_dist_vol
Type: Distributed-Replicate
Volume ID: 79882fed-5182-4491-9412-fab64ce7fb20
Status: Created
Number of Bricks: 2 x 2 = 4
Transport-type: tcp
Bricks:
Brick1: server01.glusterfs.priv:/brick01/data
Brick2: server02.glusterfs.priv:/brick01/data
Brick3: server03.glusterfs.priv:/brick01/data
Brick4: server04.glusterfs.priv:/brick01/data
root@server01:~#
root@server01:~# gluster volume start repl_dist_vol
volume start: repl_dist_vol: success
root@server01:~# gluster volume info
Volume Name: repl_dist_vol
Type: Distributed-Replicate
Volume ID: 79882fed-5182-4491-9412-fab64ce7fb20
Status: Started
Number of Bricks: 2 x 2 = 4
Transport-type: tcp
Bricks:
Brick1: server01.glusterfs.priv:/brick01/data
Brick2: server02.glusterfs.priv:/brick01/data
Brick3: server03.glusterfs.priv:/brick01/data
Brick4: server04.glusterfs.priv:/brick01/data
root@server01:~# gluster volume status
Status of volume: repl_dist_vol
Gluster process Port Online Pid
------------------------------------------------------------------------------
Brick server01.glusterfs.priv:/brick01/data 49152 Y 2469
Brick server02.glusterfs.priv:/brick01/data 49152 Y 2385
Brick server03.glusterfs.priv:/brick01/data 49152 Y 2418
Brick server04.glusterfs.priv:/brick01/data 49152 Y 2438
NFS Server on localhost 2049 Y 2483
Self-heal Daemon on localhost N/A Y 2488
NFS Server on server03.glusterfs.priv 2049 Y 2432
Self-heal Daemon on server03.glusterfs.priv N/A Y 2437
NFS Server on server04.glusterfs.priv 2049 Y 2452
Self-heal Daemon on server04.glusterfs.priv N/A Y 2457
NFS Server on server02.glusterfs.priv 2049 Y 2399
Self-heal Daemon on server02.glusterfs.priv N/A Y 2404
Task Status of Volume repl_dist_vol
------------------------------------------------------------------------------
There are no active volume tasks
root@server01:~#
4. glusterfs client 패키지 설치
client에서 마운트해 보자. Native Client 패키지를 먼저 설치한다.
root@client01:~# apt-get install glusterfs-client
5. glusterfs client 기본 구성
root@client01:~# mount -t glusterfs server01.glusterfs.priv:/repl_dist_vol /glusterfs
WARNING: getfattr not found, certain checks will be skipped..
root@client01:~# df -h
Filesystem Size Used Avail Use% Mounted on
/dev/mapper/ubuntu--vg-root 18G 1.3G 16G 8% /
udev 354M 4.0K 354M 1% /dev
tmpfs 73M 248K 73M 1% /run
none 5.0M 0 5.0M 0% /run/lock
none 364M 0 364M 0% /run/shm
/dev/sda1 236M 32M 192M 14% /boot
server01.glusterfs.priv:/repl_dist_vol 20G 65M 20G 1% /glusterfs
root@client01:~#
자동으로 볼륨 마운트하기
아래의 설정을 fstab 파일에 추가
형식)
HOSTNAME|IPADDRESS:/VOLNAME /MOUNTDIR glusterfs defaults,_netdev 0 0
예)
server01.glusterfs.priv:/repl_dist_vol /glusterfs glusterfs defaults,_netdev 0 0
6. geo-replication 관리
https://access.redhat.com/documentation/en-US/Red_Hat_Storage/2.0/html/Administration_Guide/chap-User_Guide-Geo_Rep-Preparation-Settingup_Environment.html
geo-replication은 Local Area Networks (LANs), Wide Area Networks (WANs), 인터넷을 통해 한 사이트에서 다른 사이트로의 분산, 지속, 비동기, 증분 기능을 지닌 복제 서비스를 제공한다.
geo-replication이 사용하는 master–slave 모델에서는 복제와 미러링이 아래의 파트너들 간에 일어난다.
▶ Master – Red Hat Storage volume.
▶ Slave - Red Hat Storage volume. slave volume은 localhost::volname 과 같은 형태로 local volume이 될 수도 있고 remote-host::volname 과 같은 형태로 remote host의 volume이 될 수도 있다.
6.1. 준비사항
마스터와 슬레이브 볼륨은 Red Hat Storage 인스턴스여야 한다.
슬레이브 노드는 Master trusted storage pool의 어느 노드와 peer 이어서는 안 된다.
Password-less SSH 액세스는 마스터 볼륨의 한 개 노드(geo-replication create 커맨드가 실행될 노드)와 슬레이브 볼륨(geo-replication create 커맨드를 실행할 때 slave name에서 IP/hostname이 언급될 노드)의 한 개 노드 사이에 필요하다.
ssh-keygen을 사용하여 공개키와 개인키를 마스터 노드에서 암호없이 생성한다:
root@server01:~# ssh-keygen
Generating public/private rsa key pair.
Enter file in which to save the key (/root/.ssh/id_rsa):
Enter passphrase (empty for no passphrase):
Enter same passphrase again:
Your identification has been saved in /root/.ssh/id_rsa.
Your public key has been saved in /root/.ssh/id_rsa.pub.
The key fingerprint is:
76:b6:bc:f4:50:fb:e6:a1:9a:ad:b8:d5:e9:b2:93:65 root@server01.glusterfs.priv
The key's randomart image is:
+--[ RSA 2048]----+
| |
| |
| |
| |
| S o . |
| . + +Eo |
| *++ . |
| ++B o.. |
| o.**=oo |
+-----------------+
root@server01:~#
아래 커맨드를 사용하여 공개키를 슬레이브 노드로 복사한다:
root@server01:~# ssh-copy-id root@server05.glusterfs.priv
The authenticity of host 'server05.glusterfs.priv (192.168.159.50)' can't be established.
ECDSA key fingerprint is a1:55:53:0b:38:27:52:4f:2c:78:9f:67:39:e6:f4:b8.
Are you sure you want to continue connecting (yes/no)? yes
Warning: Permanently added 'server05.glusterfs.priv' (ECDSA) to the list of known hosts.
root@server05.glusterfs.priv's password:
Now try logging into the machine, with "ssh 'root@server05.glusterfs.priv'", and check in:
~/.ssh/authorized_keys
to make sure we haven't added extra keys that you weren't expecting.
root@server01:~#
root가 아닌 계정의 geo-replicaton session을 세팅한다면, 공개키를 각각의 사용자 위치에 복사한다.
※ Note
- Password-less SSH 접속은 마스터 노드에서 슬레이브 노드 방향으로 필요하며, 슬레이브 노드에서 마스터 노드 방향으로는 필요하지 않다.
- ssh-copy-id 커맨드는 ssh authorized_keys 파일이 커스텀된 위치에 설정되었다면 동작하지 않는다. 마스터로부터 .ssh/id _rsa.pub 파일의 컨텐츠를 복사하여 슬레이브 노드의 커스텀 위치에 있는 authorized_keys 파일에 붙여넣어야 한다.
- Password-less SSH 접속은 마스터 노드에서 슬레이브 노드 방향으로 필요하며, 슬레이브 노드에서 마스터 노드 방향으로는 필요하지 않다.
- ssh-copy-id 커맨드는 ssh authorized_keys 파일이 커스텀된 위치에 설정되었다면 동작하지 않는다. 마스터로부터 .ssh/id _rsa.pub 파일의 컨텐츠를 복사하여 슬레이브 노드의 커스텀 위치에 있는 authorized_keys 파일에 붙여넣어야 한다.
password-less SSH 연결은 모든 마스터 노드와 모든 슬레이브 노드 사이의 gsyncd를 위해서도 필요하다. gluster system:: execute gsec_create 커맨드는 모든 마스터 노드에서 secret-pem 파일들을 생성하며, password-less SSH 접속을 구현하기 위해 사용된다. geo-replication 생성 커맨드의 push-pem 옵션은 모든 슬레이브 노드들로 이 키들을 삽입한다.
아래 작업을 Master, Slave 노드 모두에 조치해 둔다. 버그 때문이다.
root@KR1-PRD-FS01:~# mkdir -p /usr/libexec/glusterfs
root@KR1-PRD-FS01:~# ln -sf /usr/lib/x86_64-linux-gnu/glusterfs/gsyncd /usr/libexec/glusterfs/
6.2. root 계정으로 Geo-replication 세션 생성
1. 공통으로 쓸 pem 공개 파일을 만들기 위해, password-less SSH 접속이 설정된 마스터 노드에서 아래의 커맨드를 실행한다:
root@server01:~# gluster system:: execute gsec_create
Common secret pub file present at /var/lib/glusterd/geo-replication/common_secret.pem.pub
root@server01:~#
Common secret pub file present at /var/lib/glusterd/geo-replication/common_secret.pem.pub
root@server01:~#
2. 아래 커맨드로 geo-replication 세션을 생성한다. push-pem 옵션은 필수적인 pem-file 셋업을 슬레이브 노드들에서 수행하기 위해 필수이다.
# gluster volume geo-replication MASTER_VOL SLAVE_HOST::SLAVE_VOL create push-pem [force]
예:
# gluster volume geo-replication repl_dist_vol server05.glusterfs.priv::repl_dist_vol_slave create push-pem
3. 아래의 명령어를 실행하여 생성된 세션의 상태를 검사한다.
# gluster volume geo-replication MASTER_VOL SLAVE_HOST::SLAVE_VOL status
6.3. non-root 계정으로 Geo-replication 세션 생성
참고문서
[Gluster-users] Non-root user geo-replication in 3.6?
https://www.gluster.org/pipermail/gluster-users/2015-January/020080.html
Master, Slave 모든 서버에 공통 작업
# groupadd -g 1100 georepgrp
# useradd -u 1100 -g 1100 -m georepuser1
# passwd georepuser1
# cat /etc/glusterfs/glusterd.vol
volume management
type mgmt/glusterd
option working-directory /var/lib/glusterd
option transport-type socket,rdma
option transport.socket.keepalive-time 10
option transport.socket.keepalive-interval 2
option transport.socket.read-fail-log off
option ping-timeout 30
# option base-port 49152
option mountbroker-root /var/mountbroker-root
option mountbroker-geo-replication.georepuser1 krprddrnas
option geo-replication-log-group georepgrp
end-volume
# mkdir /var/mountbroker-root
# chmod 711 /var/mountbroker-root
# mkdir -p /usr/libexec/glusterfs
# ln -s /usr/lib/x86_64-linux-gnu/glusterfs/gsyncd /usr/libexec/glusterfs/
위까지 세팅하고 모든 glusterfs server 재시작
# gluster volume stop <volume>
# stop glusterfs-server
# start glusterfs-server
# gluster volume start <volume>
마스터 노드 중 geo-replication active node로 쓸 노드에서 root 계정으로 아래 작업
# ssh-keygen
# ssh-copy-id georepuser1@SLAVE_HOST
# gluster system:: execute gsec_create
geo-replication 세션을 생성
# gluster volume geo-replication krprdnas georepuser1@jp1-krdr-fst01::krprddrnas create push-pem
모든 마스터 노드의 /var/lib/glusterd/geo-replication 디렉토리에 MASTER_VOL-SLAVE_HOST_SLAVE_VOL 형식의 이름을 갖는 디렉토리가 생성되고 그 안에 gsyncd 동작에 필요한 설정 파일이 위치하게 된다.
root@KR1-PRD-FST01:~# ll /var/lib/glusterd/geo-replication/krprdnas_jp1-krdr-fst01_krprddrnas/
total 16
drwxr-xr-x 2 root root 4096 May 15 11:19 ./
drwxr-xr-x 3 root root 4096 May 15 11:19 ../
-rwxr-xr-x 1 root root 1872 May 15 11:19 gsyncd.conf*
-rwxr-xr-x 1 root root 12 May 15 11:19 ssh%3A%2F%2Fgeorepuser1%40192.168.93.166%3Agluster%3A%2F%2F127.0.0.1%3Akrprddrnas.status*
root@KR1-PRD-FST01:~#
그리고 슬레이브 노드의 non-root account 홈디렉토리에 common_secret.pem.pub 이 위치하게 된다.
root@jp1-krdr-fst01:/home/georepuser1# ll /home/georepuser1/
total 32
drwxr-xr-x 4 georepuser1 georepgrp 4096 May 15 11:51 ./
drwxr-xr-x 4 root root 4096 May 15 11:07 ../
-rw-r--r-- 1 georepuser1 georepgrp 220 Mar 29 2013 .bash_logout
-rw-r--r-- 1 georepuser1 georepgrp 3486 Mar 29 2013 .bashrc
drwx------ 2 georepuser1 georepgrp 4096 May 15 11:16 .cache/
-rw------- 1 georepuser1 georepgrp 1766 May 15 11:51 common_secret.pem.pub
-rw-r--r-- 1 georepuser1 georepgrp 675 Mar 29 2013 .profile
drwx------ 2 georepuser1 georepgrp 4096 May 15 11:51 .ssh/
root@jp1-krdr-fst01:/home/georepuser1#
세션 생성 명렁어 실행 시 마스터의 S56glusterd-geo-rep-create-post.sh 스크립트가 실행되어 키 세팅이 이루어진다.
https://github.com/gluster/glusterfs/blob/master/extras/hook-scripts/S56glusterd-geo-rep-create-post.sh
# cat /var/lib/glusterd/hooks/1/gsync-create/post/S56glusterd-geo-rep-create-post.sh
#!/bin/bash

key_val_pair1=`echo $2 | cut -d ',' -f 1`
key_val_pair2=`echo $2 | cut -d ',' -f 2`
key_val_pair3=`echo $2 | cut -d ',' -f 3`
key_val_pair4=`echo $2 | cut -d ',' -f 4`

key=`echo $key_val_pair1 | cut -d '=' -f 1`
val=`echo $key_val_pair1 | cut -d '=' -f 2`
if [ "$key" != "is_push_pem" ]; then
    exit;
fi
if [ "$val" != '1' ]; then
    exit;
fi

key=`echo $key_val_pair2 | cut -d '=' -f 1`
val=`echo $key_val_pair2 | cut -d '=' -f 2`
if [ "$key" != "pub_file" ]; then
    exit;
fi
if [ "$val" == "" ]; then
    exit;
fi
pub_file=`echo $val`
pub_file_tmp=`echo $val`_tmp

key=`echo $key_val_pair3 | cut -d '=' -f 1`
val=`echo $key_val_pair3 | cut -d '=' -f 2`
if [ "$key" != "slave_user" ]; then
    exit;
fi
if [ "$val" == "" ]; then
    exit;
fi
slave_user=`echo $val`

key=`echo $key_val_pair4 | cut -d '=' -f 1`
val=`echo $key_val_pair4 | cut -d '=' -f 2`
if [ "$key" != "slave_ip" ]; then
    exit;
fi
if [ "$val" == "" ]; then
    exit;
fi
slave_ip=`echo $val`

if [ -f $pub_file ]; then
    # For a non-root user copy the pub file to the user's home directory
    # For a root user copy the pub files to priv_dir->geo-rep.
    if [ "$slave_user" != "root" ]; then
        slave_user_home_dir=`ssh $slave_user@$slave_ip "getent passwd $slave_user | cut -d ':' -f 6"`
        scp $pub_file $slave_user@$slave_ip:$slave_user_home_dir/common_secret.pem.pub_tmp
        ssh $slave_user@$slave_ip "mv $slave_user_home_dir/common_secret.pem.pub_tmp $slave_user_home_dir/common_secret.pem.pub"
    else
        scp $pub_file $slave_ip:$pub_file_tmp
        ssh $slave_ip "mv $pub_file_tmp $pub_file"
        ssh $slave_ip "gluster system:: copy file /geo-replication/common_secret.pem.pub > /dev/null"
        ssh $slave_ip "gluster system:: execute add_secret_pub > /dev/null"
    fi
fi
non-root일 때와 root일 때의 로직이 서로 다르다. 어쩐지 root로 geo-repl 세팅할 때엔 잘 되던데 non-root로 세팅할 때엔 create push-pem까지 진행해도 안 되는 이유가 저 스크립트에 있었다.
ssh $slave_ip "gluster system:: copy file /geo-replication/common_secret.pem.pub > /dev/null"
ssh $slave_ip "gluster system:: execute add_secret_pub > /dev/null"
위 로직이 non-root일 때는 진행되지 않는 것이다.
비슷한 로직이 포함된 스크립트로 set_geo_rep_pem_keys.sh가 있다. 이건 슬레이브의 로컬에서 실행하는 용도로 보인다. 결국 마스터에서 create push-pem을 실행한 뒤 슬레이브 로컬에서 아래 스크립트 실행이 한 번 더 필요한 것이었다.
https://github.com/gluster/glusterfs/blob/master/geo-replication/src/set_geo_rep_pem_keys.sh
# cat /usr/lib/x86_64-linux-gnu/glusterfs/set_geo_rep_pem_keys.sh
#!/bin/bash

# Script to copy the pem keys from the user's home directory
# to $GLUSTERD_WORKDIR/geo-replication and then copy
# the keys to other nodes in the cluster and add them to the
# respective authorized keys. The script takes as argument the
# user name and assumes that the user will be present in all
# the nodes in the cluster. Not to be used for root user

function main()
{
    user=$1
    if [ "$user" == "" ];  then
        echo "Please enter the user's name"
        exit 1;
    fi

    if [ "$user" == "root" ]; then
        echo "This script is not needed for root"
        exit 1;
    fi

    home_dir=`getent passwd $user | cut -d ':' -f 6`;

    if [ "$home_dir" == "" ]; then
        echo "No user $user found"
        exit 1;
    fi

    if [ -f $home_dir/common_secret.pem.pub ]; then
        cp $home_dir/common_secret.pem.pub ${GLUSTERD_WORKDIR}/geo-replication/
        gluster system:: copy file /geo-replication/common_secret.pem.pub
        gluster system:: execute add_secret_pub $user
    else
        echo "$home_dir/common_secret.pem.pub not present. Please run geo-replication command on master with push-pem option to generate the file"
        exit 1;
    fi
    exit 0;
}

main "$@";
따라서 슬레이브에서 한 번 더 추가 작업 필요하다. 슬레이브에서 set_geo_rep_pem_keys.sh 실행한다. 그런데 얘조차 문제가 있다.
root@jp1-krdr-fst01:~# /usr/lib/x86_64-linux-gnu/glusterfs/set_geo_rep_pem_keys.sh georepuser1
cp: cannot create regular file `/geo-replication/': Not a directory
Source file does not exist in /var/lib/glusterd
Unable to end. Error : Bad file descriptor
root@jp1-krdr-fst01:~#
GLUSTERD_WORKDIR 변수가 선언되어 있지 않아 아래 로직 실행 시 에러 나는 것이다. glusterfs 얘네 진짜 왜이러냐...
cp $home_dir/common_secret.pem.pub ${GLUSTERD_WORKDIR}/geo-replication/
set_geo_rep_pem_keys.sh 상단에 변수 선언해주고 실행하면 성공한다. 수고 많으셨다...
GLUSTERD_WORKDIR='/var/lib/glusterd'
root@jp1-krdr-fst01:~# /usr/lib/x86_64-linux-gnu/glusterfs/set_geo_rep_pem_keys.sh georepuser1
Successfully copied file.
Command executed successfully.
root@jp1-krdr-fst01:~#
사실 set_geo_rep_pem_keys.sh는 /home/<non-root user>/.ssh/authorized_keys 에 /var/lib/glusterd/geo-replication/common_secret.pem.pub의 내용을 추가하는 일만 할 뿐이다. 따라서 마스터에서 create push-pem 실행 후 슬레이브에서 set_geo_rep_pem_keys.sh 실행을 생략하고 common_secret.pem.pub 키 내용을 슬레이브 non-root 계정의 .ssh/authorized_keys에 수동으로 붙여넣어도 된다.
root@KR1-PRD-FST01:~# cat /var/lib/glusterd/geo-replication/common_secret.pem.pub
command="/usr/libexec/glusterfs/gsyncd" ssh-rsa AAAAB3NzaC1yc2EAAAADAQABAAABAQDFGNVJ7HBt1wiV0CAqei2DwBGRK9/LHqyA3kEiswI3uzH+JNeJcFGKMPXVilQURB+7dbc/2qnuzJQmLShO3GJc7R5fc3FPjOuUhHwYthO7fM+IxdyrDKX4mlI6xzmOhbcS+Xi7kEPebuoa55N2Q4g+g8DzLl2+2zXlcLv3n1ipcWgaC40nqDoFYgzUmFV5Hga16cdMPd7wvAhuTUUIa+lDhbC4BrEqN/apxT0/HD602/3UOt0BHADFPvTfk9Y0B+Wr6Uigm7pm2Di+cX20YC8dL91nQB1KCnhlcWiDfpefziq67smj7cJZCeT/N4a34YhFzhfAq0LO7Q9I1EmACy0t root@KR1-PRD-FST01
command="tar ${SSH_ORIGINAL_COMMAND#* }" ssh-rsa AAAAB3NzaC1yc2EAAAADAQABAAABAQDK+rWkXCw2bgz1Nf5ssj9+Bs/WCa8z/kMPRFWQodgeHAzFJYQOHahnTFyDX1d5Xg8r+05touZ2v/tHYCCFHNgnbMx2YBzTz2tghBjxcb81egqyMz+uB/xf6RsB8c+f4Ntk8TP+7RIOoB2aDRJp5F6Ikf80NEZFTriHB2akfCSjTBOApM5rY+S6ITUf0SjGz3Pe9HnYYj/qxcG0Tr4DVCoPM6iFP5OzqLDEsUPVRcoO/Z1pqBpYYC0n63zT2ixqWtqVtJTnmgWfD5LAgSB9kXOUoXeuEppCdIR3JBiQ6tYZXe/guMoc+XKqLyv+n5mzWb3kppt2lBLOA62mkbaeZQ9/ root@KR1-PRD-FST01
command="/usr/libexec/glusterfs/gsyncd" ssh-rsa AAAAB3NzaC1yc2EAAAADAQABAAABAQDaoyLDE+HcBfMWIMfGJX1qflNhmip9FOZMc73pKWObpzw5Muq+6jbwx+yhT2yWJx99Pa+u695kvATq/f4r72ZaoiYuFQLAIo/KAAdouL1EFNtu6kBmz+CFI7Yrktf8DpdJgb/D3RHwpbauno9j77r3eIyf9VqVrAdo4gHIa0BgcWnLTgqzvYpCvdhz7jRXBQUua2LRZuLqNIV1n/EXF1F7EQk6wonUP9lMEhcPH9DD9iP6kjrUIaVnS16NblT0lQyCgwpB+qm7tMim1E8183/esDUF40gOhhVGTcLX0LjGgQ2t2zX044y6gWbyLo+nyf9NFrXf7DvPtF8g+oQb/nhN root@KR2-PRD-FST02
command="tar ${SSH_ORIGINAL_COMMAND#* }" ssh-rsa AAAAB3NzaC1yc2EAAAADAQABAAABAQCiuqxr+0D/BI0vQaozQUd7RqFnbSnhJ2LbWSoW5nN8QjvX0WqhkMHm3qjASl5p4JbkaIlATOOPASk279tI2p+jd18PsExTdmJLBiTdlArm++SN8aD7xkOe5myTH/tDcW9xOFmLYR+FJoR9HPADbd+qag9Z/ds2PPdqs7bxbiu+uPmx0tpF8awSIIcs8/hIz1xX8xPZ93R5kH8664P9n4p2OXnbXKzhPfPEUtJ83sMAvcmELBtlvN/WsJ5ACBLOs7DIJhRKdlnKsAg7UwoY9QuyxviVMkKzhf7nXRy9fmm78YBSyMNGYw2g8pDiRyO7pJamdPUxkTRi21nxNNig17+n root@KR2-PRD-FST02
root@jp1-krdr-fst01:~# cat /home/georepuser1/.ssh/authorized_keys
ssh-rsa AAAAB3NzaC1yc2EAAAADAQABAAABAQDB/3T7GoOYNxpo49LVHRglznaqH9Dpn8q+ZiAUjKwT7heHnzpCgFp9/FzxfJh2FtHlZnJhtEDrlg4U6nrmmhdmVIwywgjdRtwW0wfmtCJSoO7OfnE9QU80aKBgjEhC9w6hYcEr1AcUYbPU/occE0FbGwnB0jFtBiCwPFL9/QWVz9mvm60a9o7cZna81OAu5zRQpGq5UMBm6wZYwONspi/v/D4df/qhmfiDlzyv9HFWU2qr0lXDOgHxtLfywC5Tdz5NB6x9SwNFXpQAXDC/ArXiIMoIu7oCBHQWjinQd25fydVfFimyml+bzynLAzPmKQmVbB/fx/2/u8KOQY4yabfd root@KR1-PRD-FST01
command="/usr/libexec/glusterfs/gsyncd" ssh-rsa AAAAB3NzaC1yc2EAAAADAQABAAABAQCy2+7EOn56OIovc6taAjmQWJyHA2UyfnlWhZWrxSuKyOXW4ZY6h+k7qV7sTUsSP8bqRfgr0NwerVzavMvwrRuolVeTvm4cAAXvhZHW7YJDRTjR+eqpVitX0cwbymDZ5zD7HDWvkQz4fefkIscy8B3GN4QE1eDeyQpx2B9cofvXFUV7OV58D5RmwwBPR6A25roVzR8eB3XWzRM0CU7DId5fsWjP3BjVP7VM2DJpbYT4Ky8FJXNK4Ein3N8unzjxkAttzc1LZ7EiKC8y0lO8g3ISlyCe/EG9IXmJm29Pl+G0dim70zplM6Jz2viYNP3aut5g1IEWwEWR4x55X0NV7VB9 root@KR1-PRD-FST01
command="tar ${SSH_ORIGINAL_COMMAND#* }" ssh-rsa AAAAB3NzaC1yc2EAAAADAQABAAABAQC+M3eC4jZsloaJZUbaFz4/jhbSdy9mI0kb8jBGBcc5IcdbxV3ooAMzjpHxdmI+IRMe/MAKWWrX3PTOE1nXy4u1pG/XgQbfzpqowLqrTxUbc4+mKHNGQW+4osouGpQxvyhNMqmmiln6UIAwrC0/4UlIvCm50pwQZjfsPYyjZ2kBgknN+5QDYXaCcYm38OP/rcaFsSje++GmWdai32S23VU2c8V8bfgCz9UOYFY7Aj3fAvMaYCikO1rz9/GmRe1AhpqhlFXVWx7YSgCfR/+gY88VOtFoI0jAnD7qykIIBkr5e3Oqr80D2VLvEfbjXpzoBn2SHnk806paw9LidA6HzoLX root@KR1-PRD-FST01
command="/usr/libexec/glusterfs/gsyncd" ssh-rsa AAAAB3NzaC1yc2EAAAADAQABAAABAQDm0rq7hg4qdimK303VyMSCw+3cFV7tETHBoKg6mAKcfyU5Jmoab007KZXHwkBwm2Kh7rQVwgQmxiR35AtamNvh9nkvVh89JivKrgG0qwduXdRupQcHkJwkdtbQmYA49hT/QXuIZz+okTZMLot9H+e7RqAO+ajAM5HjcBTIgoS9QUyR5e+kkb3paCblatTUGGZOvW1Xnv0SiOitsiXvN0R43aQ1Yq96nBKQxkYtIX+SJn1c7Mf9IaFgNct/dn++ruAdNBZiA4DlnPZ1EAH6CqaA6OIdURizLLlZakQeud/JD1QDhJFYP4JJ6OIX6XVf9kjaxVaqtkez6SdFcMIZDsdv root@KR2-PRD-FST02
command="tar ${SSH_ORIGINAL_COMMAND#* }" ssh-rsa AAAAB3NzaC1yc2EAAAADAQABAAABAQDJrEiTK4L/o5X8hNIrTpDWNx6z6U992GzvylUguBBj6UxHrmWshITHyFTf/0eyp+l5L1Rw8EhjCmGoYmAWLkJHG1NpJsh+R0tFfXMBsF54ggnCqt0llkhvxfE1mxVez2gG1JnpJUAgy3H0XMM1EYuL2H1Kg4r/yNCPuMutGz9PeYMICi0UEu/4x9wBv7Jw+nchqGjDLn49o+9JcHUgJ2hZM1SsnlRSqoESZlekX3xa1Um8WABVKZhyoTZzIQoNMHNQ9unqvZ7dK39P8UpGQGfQG1+pX9+XFy9KfpbOlP+RHZ+Fap+BEpaJkRKcWpjzAbgPhfl/762vYcJ7VtnwJQoz root@KR2-PRD-FST02
root@jp1-krdr-fst01:~#
일반적인 authorized key와 달리 'command'가 들어 있다. 이는 로긴한 사용자가 authorized key에 명시된 gsyncd나 특정 명령어만을 사용할 수 있도록 제한하기 위해 사용되는 방법이다.
https://www.gluster.org/pipermail/gluster-users/2014-December/019875.html
세션 생성 시 내부적으로 어떤 로직이 동작하는지에 대해서는 아래 문서 참고
※ GlusterFS Geo-replication Tutorials – Understanding Session Creation
http://blog.gluster.org/2015/04/glusterfs-geo-replication-tutorials-understanding-session-creation/
geo-replication 관련 버그질라
Bug 1199885 - geo-rep: Proper Libexec directory in gsec_create command
https://bugzilla.redhat.com/show_bug.cgi?id=1199885
Bug 1183229 - Geo-Replication creation of common_secret.pem.pub file with gsec_create
https://bugzilla.redhat.com/show_bug.cgi?id=1183229
6.4. Secure Geo-replication Slave를 위한 환경 설정
글러스터fs 로그 쌓이는 경로 바꾸는 명령어 인자값인
gluster volume log filename <VOLNAME> [BRICK] <DIRECTORY>
요고 3.3.0 오면서 없어진 거 같네요. 레드햇 버그질라 참고하세요. 맨 아래 달린 리플에 언급되어 있네요.
glusterfs-3.3.0 doesn't have 'gluster log filename'. Hence moving it as CLOSED UPSTREAM
https://bugzilla.redhat.com/show_bug.cgi?id=768005
※ glusterfs server 기존 설정정보 clear
glusterfs server 서비스를 stop한다.
# stop glusterfs-server
stop 잘 안 되면 프로세스를 kill한다.
# ps auxww | grep gluster
# kill -9 <pid>
glusterfs server 구성 정보가 들어 있는 path를 모두 삭제한다.
# rm -rf /var/lib/glusterd/*
GlusterFS 3.3 부터는 디렉토리가 이미 있는 볼륨인지 체크한다. 따라서 brick path에 있는 기존 볼륨 정보를 clear해야 한다.
setfattr -x trusted.glusterfs.volume-id $brick_path
setfattr -x trusted.gfid $brick_path
rm -rf $brick_path/.glusterfs <- 데이터 용량에 따라 시간이 좀 걸릴 수 있다.

