위 링크페이지 최하단에 펭귄로고 있는 부분의 Open Source driver(v1.19 Standard version)다운로드
[root@localhost ~]# wget http://www.highpoint-tech.com/BIOS_Driver/rr1820a/Linux/rr18xx-opensource-v1.19-080710.tgz
적당한데 압축 풀고 README.txt 파일 읽어보고 아래와 같이 진행하였는데...
[root@localhost ~]# make && make install
[root@localhost ~]# modprobe hptmv
[root@localhost ~]# modprobe hptmv
아래와 같이 콘솔에 무수한 에러 비스무리한 메시지들이 줄줄 나오다가 수십초 후 컨트롤러 스피커에서 비프음이 마구 나옴. 컨트롤러 드라이버 잡기 실패...
(xxxxxxxxx 라고 표기한 부분은 숫자임, 아마도 랜덤하게 발생하는 숫자로 보임)
mv_process_crpb_response: no qc for tag=xxxxxxxxx
mv_process_crpb_response: no qc for tag=xxxxxxxxx
mv_process_crpb_response: no qc for tag=xxxxxxxxx
mv_process_crpb_response: no qc for tag=xxxxxxxxx
mv_process_crpb_response: no qc for tag=xxxxxxxxx
mv_process_crpb_response: no qc for tag=xxxxxxxxx
mv_process_crpb_response: no qc for tag=xxxxxxxxx
mv_process_crpb_response: no qc for tag=xxxxxxxxx
mv_process_crpb_response: no qc for tag=xxxxxxxxx
mv_process_crpb_response: no qc for tag=xxxxxxxxx
mv_process_crpb_response: no qc for tag=xxxxxxxxx
아래 링크 통해 해결
http://www.linuxquestions.org/questions/slackware-14/highpoint-rocketraid-1820a-install-problems-630978/
---> 원인은 기존 커널에 의해 로드되어 있는 sata_mv(Marvell MV88SX5081 Serial ATA controller용 드라이버) module과 새로 추가하고자 하는 Highpoint RocketRAID 1820A의 hptmv module이 서로 충돌하기 때문
modprobe hptmv 하기 전에 sata_mv를 없애주면 된다.
[root@localhost ~]# rmmod sata_mv
시스템 리부팅 시에도 sata_mv 모듈이 올라오는 것을 막으려면
[root@localhost ~]# echo "# ATA Devices" >> /etc/modprobe.d/blacklist
[root@localhost ~]# echo "blacklist sata_mv" >> /etc/modprobe.d/blacklist
[root@localhost ~]# echo "blacklist sata_mv" >> /etc/modprobe.d/blacklist
시스템을 부팅할 때마다 자동으로 hptmv 모듈이 올라오도록 하려면 아래와 같이 조치한다.
(참고링크 : https://www.linuxquestions.org/questions/linux-hardware-18/highpoint-1820a-raid-card-install-on-centos-3.4-327281/)
[root@localhost ~]# uname -r
2.6.27.4
[root@localhost ~]# mv /boot/initrd-2.6.27.4.img /boot/initrd-2.6.27.4.img.bak
[root@localhost ~]# mkinitrd --with=hptmv /boot/initrd-`uname -r`.img `uname -r`
※ 하이포인트 홈페이지에서 제공하는 메뉴얼에서 소개하는 내용은 init 스크립트를 이용하는 방법인데 이 경우 hptmv 모듈을 /etc/fstab 파일을 불러들인 이후에 로드하는 방법이라 /etc/fstab에 레이드 어레이에 잡아놓은 파티션을 등록해봤자 무용지물이다. 그러므로 부팅 초기 단계에서 hptmv 모듈을 로드할 수 있으려면 mkinitrd 도구를 이용하여 기존 커널 이미지에 hptmv 모듈을 포함시켜 정적으로 컴파일된 커널이미지를 새롭게 만들어 주어야 한다.2.6.27.4
[root@localhost ~]# mv /boot/initrd-2.6.27.4.img /boot/initrd-2.6.27.4.img.bak
[root@localhost ~]# mkinitrd --with=hptmv /boot/initrd-`uname -r`.img `uname -r`
lshw를 통해 본 컨트롤러 스펙
*-scsi
description: SCSI storage controller
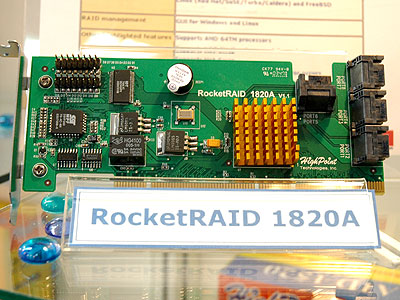
product: MV88SX5081 8-port SATA I PCI-X Controller
vendor: Marvell Technology Group Ltd.
physical id: 3
bus info: pci@0000:01:03.0
logical name: scsi2
version: 03
width: 64 bits
clock: 66MHz
capabilities: scsi pm msi pcix bus_master cap_list scsi-host
configuration: driver=hptmv latency=64
description: SCSI storage controller
product: MV88SX5081 8-port SATA I PCI-X Controller
vendor: Marvell Technology Group Ltd.
physical id: 3
bus info: pci@0000:01:03.0
logical name: scsi2
version: 03
width: 64 bits
clock: 66MHz
capabilities: scsi pm msi pcix bus_master cap_list scsi-host
configuration: driver=hptmv latency=64
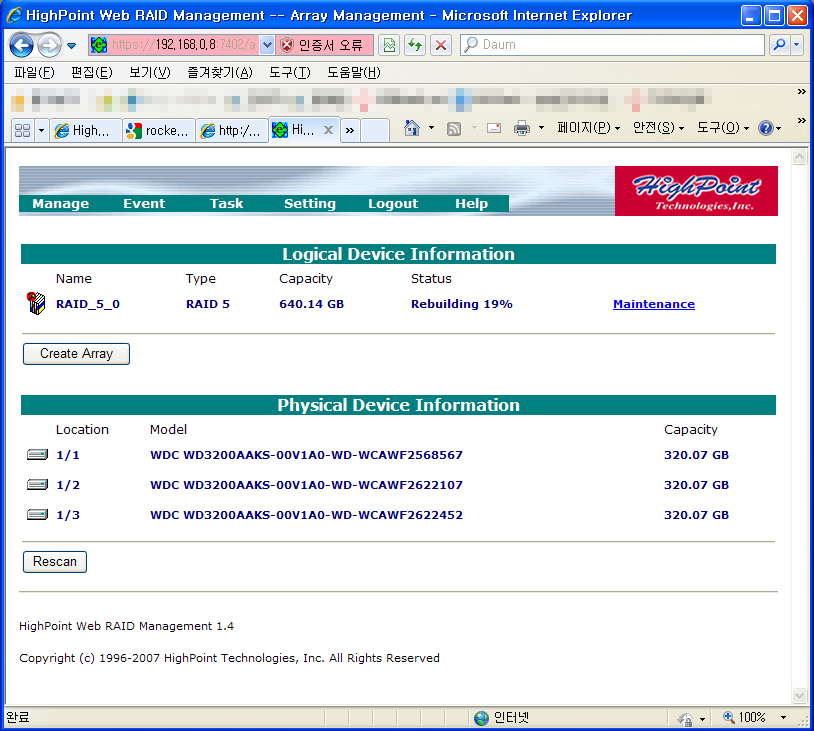
RAID Management Utility(Web GUI)를 설치해서 웹브라우저로 편리하게 관리한다(초기 인증 정보 : RAID / hpt )
[root@localhost ~]# wget http://www.highpoint-tech.com/BIOS_Driver/HRM/Linux/WebGui-Linux-v1.4-8-080829.tgz
[root@localhost ~]# tar xvfz WebGui-Linux-v1.4-8-080829.tgz
[root@localhost ~]# cd WebGui-Linux-v1.4-8-080829
[root@localhost WebGui-Linux-v1.4-8-080829]# rpm -ivh hptsvr-https-1.4-8.i386.rpm
[root@localhost WebGui-Linux-v1.4-8-080829]# echo "/etc/init.d/hptdaemon start" >> /etc/rc.d/rc.local
[root@localhost WebGui-Linux-v1.4-8-080829]# /etc/init.d/hptdaemon start
[root@localhost WebGui-Linux-v1.4-8-080829]# netstat -ntlp | grep hptsvr
tcp 0 0 0.0.0.0:7402 0.0.0.0:* LISTEN 1909/hptsvr
[root@localhost ~]#
iptables 방화벽에서 tcp 7402 포트를 열어주고 https://서버IP:7402 로 접속하면 된다.